Fried Green Tomatoes

IMG_4796

Living in Australia during the holiday season makes me crave Southern food from home since it’s summer and doesn’t really feel like Christmas.  Luckily, my search efforts were rewarded with a few green tomatoes at the market this weekend that were hiding in a box full of hundreds of tomatoes.  It didn’t take long before I had those beauties coated in dredge and sizzling in oil in my trusty cast iron skillet.

IMG_4793

When it came to treating these green tomatoes with the respect they deserved I turned to my Southern Cooking bible – The Lee Bros. Southern Cookbook.  At first, I was skeptical about two yankee transplants’ ability to write a cookbook on Southern food but they’ve done their research and it’s an incredible book that includes some good stories behind the recipes.  Definitely pick up a copy if you are interested in Southern American cooking.

Since the Lee Bros have spent a lot of time in New York where green tomatoes are about as popular as they are in in Australia, they include instructions on how to turn firm unripe tomatoes into the tangy taste of green tomatoes – just slice, sprinkle with a little salt and lemon juice before dredging.  I wish I had known this earlier!  They also have a section on how to source green tomatoes, since they rarely make it to the market.  Basically, you need to talk to a local tomato grower or grow your own.

I always eat my fried green tomatoes with ranch dressing – if you are ambitious then homemade ranch is definitely worth the extra effort.

Fried Green Tomatoes adapted from The Lee Bros. Southern Cookbook

Ingredients

  • 3-4 medium green tomatoes
  • 3 large eggs, beaten
  • 3/4 cup whole milk
  • 3 cups peanut or canola oil (or just enough to fill 1/3 inch deep in the skillet)

For the fry dredge:

  • 1/2 cup all purpose flour
  • 3 tbs stone-ground cornmeal (I use Red Mill)
  • 2 tsp salt
  • 1 1/2 tsp freshly ground black pepper
  • pinch of red pepper flakes (optional, for a spicy kick)

Preparation:

  1. Sift the flour, cornmeal, salt and pepper in a bowl.  Stir and spread onto a large plate or pie pan.
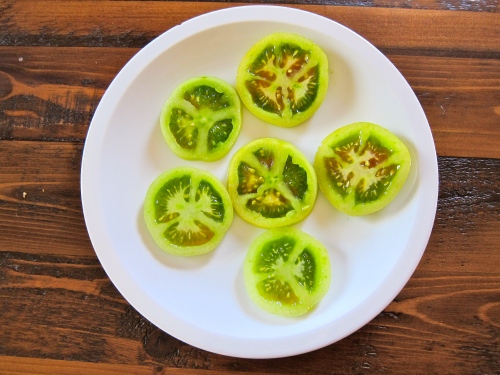
  2. Cut the tomatoes to 1/4 inch thickness with a serrated tomato or bread knife.
  3. Whisk the eggs and milk together in a broad, shallow bowl.
  4. Pour the oil into a 12-in skillet and heat over medium-high heat until the temperature on a candy thermometer reads 375 F (190 C), or until a pinch of flour sizzles when added to the oil.  If using a different sized skillet just fill with oil to the depts of 1/3 of an inch.
  5. Heat the oven to 225 F (107 C).  Set a baker’s rack on a cookie sheet on the top rack.
  6. Taste the tomatoes, if they aren’t tart then sprinkle with salt and lemon juice.
  7. Press 1 tomato slice into the dredge, once on each side, shaking any excess loose.  Dunk in egg mixture, then dredge the slice on both sides again.  Shake of any excess and place the slice on a clean plate.  Repeat with more slices until you’ve dredged enough for a batch (3 to 4).
  8. With a spatula, transfer the first batch to the oil.
  9. As the first batch cooks, dredge the 2nd batch of tomatoes, but keep an eye on the first.
  10. Once the slices have turned golden brown on one side (about 2 minutes), flip them carefully and fry for 2 minutes more or until golden brown.
  11. Transfer the fried tomatoes to a plate lined with double thickness paper towels and drain for 1 minute.
  12. Transfer the slices to the baker’s rack in the oven, arranging them in a single layer, so they remain warm and crisp.
  13. Repeat with the remaining slices until all the green tomatoes have been fried.
  14. Serve right away with ranch dressing.

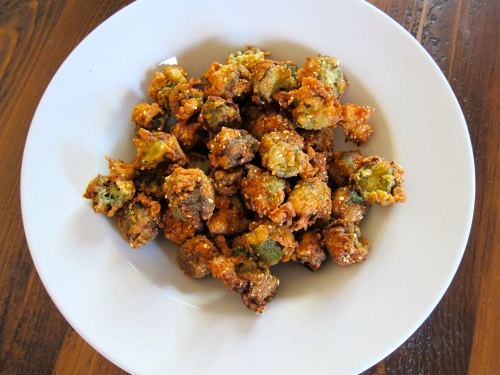
This fry dredge can be used to fry other veggies and even fish, such as whiting.  I got a little carried away and sliced some okra to 1/4 inch thickness and followed the same dredging and frying process.

IMG_4801


Diner en Blanc Brisbane

Image

You might have heard of the famously exclusive Diner en Blanc pop up picnics that started over 25 years ago in Paris by François Pasquier.  What started as a gathering of a small group of friends has grown to over 15,000 people in Paris each year and has since expanded to cities around the world.

The rules are simple, yet strictly enforced and specify that you must dress elegantly in head to toe white, bring a table of a certain size, 2 white chairs, white table linens, white dishes and cutlery, and your own food for an elegant picnic. The location is only revealed just before the picnic begins and has historically been held at iconic locations in Paris such as the Eiffel Tower site, the Louvre Pyramid, the Château de Versailles, and the Champs-Élysées. The highly coveted invitations first go to friends of the organisers and their recommendations, then are open to the public waiting list, which reached over 30,000 just a few hours after registration opened for the New York City event.

Thanks to my dad’s obsession with Twitter, I found out about Australia’s first Diner en Blanc event in Brisbane early enough to get my name on the waiting list and buy tickets through the general registration.  I now know that it was a stroke of luck that I was able to get through the online ticket purchasing process since it sold out in 20 minutes and ended up with a waiting list of almost 7,000.

After several weeks of anticipation and preparation gathering all of our white essentials, the big day arrived on the first day of Spring.  We were assigned one of the 5 transport locations in Brisbane where we had to meet a bus that would take us to the secret location.  When we arrived there were 3 white buses and a swarm of white clad picnic goers buzzing around trying to guess the secret location we were about to descend upon like a flash mob.  We were only told once en route that we were heading for the Queensland Performing Arts Complex Forecourt at Southbank  (an easy guess) – right on the Brisbane River across from the city skyline with the white Wheel of Brisbane as the backdrop and views of the white Victoria Bridge, an iconic location and the perfect spot for Brisbane’s first Diner en Blanc.

When we arrived at Southbank we disembarked the buses and were instructed by our table leader to our row and began setting up our tables and chairs in an organised formation on the lawn while confused onlookers and theatre goers tried to figure out what was happening.

The protocol is that everyone must wait for all of the tables to be set up for the start of the dinner, which took about 10 minutes from the time we arrived and  was signalled by everyone waiving their white napkins in the air.

Setting up

We spent the diner meeting the people on our table row, swapping interesting nibbles, and admiring the effort that everyone had gone through to decorate their table.  There were full silver services, 3 tiered stands, meringue towers, elegant candelabras, even white painted sticks that formed a canopy over two tables (see picture).

There was live music that meandered through the rows of tables serenading the guests and people mingling, eager to see who else had received one of the coveted 1,000 places at the event.

At 9pm we all lit sparklers, which signalled the beginning of the dancing, which brought everyone together for an eclectic all white dance party under the stars with a backdrop of the Brisbane city skyline.  It was unforgettable.

After the last song was played everyone disassembled their temporary elegant creations, packed up their belongings and left the location, leaving no trace behind.

It was a magical evening that I encourage everyone to seek out and attend wherever possible.

For information on Diner en Blanc visit their website.

Bami’s Famous Sugar Cookies

Image

Today is my belated grandmother Bami’s birthday, so I decided to make her famous sugar cookies, which was one of her signatures and one of my fondest memories of her.

We used to always request these special cookies on our birthdays and Bami always made so many of them that I swear they could have lasted you until your next birthday.  I also remember them being a staple on our Thanksgiving and Christmas dessert table.

The secret to these cookies is the special glass that has glass bubbles on the bottom (very trendy in the 1970s) that you use to make indentations on the top of the cookie.  No one knows where Bami’s official glass is, but my boyfriend’s mom knew I was on the lookout for one and found one in her belated mother’s old glassware so she passed it on to me.  Now that I have the recipe AND the special glass I can finally do her cookies some justice and they’ll be on my dessert table every Thanksgiving and Christmas.

These are very delicate sugar cookies due to the use of a mix of white sugar and confectioners sugar.  They are also unusual in that they use 3 types of fats – butter, margarine, and oil.  The dough consistency is not as dense as normal cookie dough so definitely don’t skip the step where you freeze the dough – it will be difficult to roll it into balls if you don’t.

So without further adieu – here is the family recipe:

Makes about 9 dozen (I’ve divided this recipe by 4 and it’s turned out fine)

Ingredients

  • 1 cup white sugar
  • 1 cup confectioners sugar
  • 1 stick margarine (not softened)
  • 1 stick butter (not softened)
  • 1 cup oil
  • 2 eggs beaten
  • 1 tsp vanilla (add along with dry ingredients and oil)
  • 4 cups plain (unsifted) flour
  • 1 tsp cream of tartar
  • 1 tsp baking soda
  • ½ tsp salt

Preparation

  • Sift dry ingredients except sugar
  • Cream butter, margarine and sugars.  Gradually add beaten eggs to mixture.
  •  Blend  in dry ingredients, pouring in the oil and vanilla gradually.  When the dough gets too stiff for mixer, finish it by hand.
  • Freeze until hard.
  • Roll into small balls.  Press bottom of a glass than has been dipped in granulated sugar.*
  • Put about 15 on each tray.
  • Bake at 350 degrees for about 10 minutes or to desired color.

*Note: I could’t figure out how Bami stamped the cookie dough with the glass before they had baked because the dough just kept sticking to the glass.  Instead, I baked the cookies until they were almost ready, then I pulled them out of the oven, stamped them with the sugar coated glass, then popped them back in the oven for 2 more minutes until they were done.

Image

A Sunday Pierogi (or Pyrohy) Making Session

As I’ve mentioned a few times on this blog, I’m a big fan of any food that consists of something encased in a carbohydrate such as meat pies, samosas, empanadas, ravioli, pastizzi, etc.  So it was only a matter of time before I discovered pierogi, which are eastern European dumplings filled with cheesy mashed potato – an epic combination. I’ve wanted to learn how to make them myself but haven’t been able to get the recipe out of anyone until recently. Sure, I could have googled it, but I wanted a true family recipe.

One of my friends at work is Ukranian Canadian and said that her grandma made the best pierogi (or pyrohy/пироги as they say in Ukranian) so she invited me over for  a Sunday afternoon pyrohy making session with her roommate.  When she said that her grandma’s recipe didn’t have exact measurements for several of the ingredients since she always made it from memory I knew this was going to be the real deal.

My friend had never actually made pyrohy before so we had her grandparents on skype in the kitchen to walk us through the tricky parts (in Ukranian!), such as what consistency the dough should be, which involved my friend squeezing the ball of dough in front of the webcam for her grandma.  It was a pretty cool cooking experience and it all ended up working out perfectly, thanks to some help from her adorable grandparents!

We learned that having Frank Sinatra playing in the background makes the time go faster and that when in doubt, add more butter. So tell your gallbladder to man up!

It took us over 3 hours to make about 6 dozen pierogi but the reward was well worth it.

Pyrohy with Cheesy Mashed Potato Filling – A Stefaniw Family Recipe

Ingredients:

Dough:

  • 3 cups flour
  • 2 tbsp oil
  • 1 egg
  • 1 cup warm water

Filling:

  • 9 small (or 6 large) russet potatoes
  • ¾ cup (about 200g) butter
  • 1-2 yellow onions (shredded with a mandolin or finely chopped)
  • 2 cups cheddar cheese
  • salt & pepper to taste

Toppings:

  • Sour cream
  • Chopped onions sautéed in butter

Preparation:

To make the dough, whisk the egg and the cup of water and the oil and stir until combined.

Combine the liquid mixture with the flour.  Mix by hand to form a ball of dough.  If the dough does not come together, add 1 tbsp of water at a time until it comes together. It should not be a sticky dough.

Knead the dough on a lightly floured surface for about 3 minutes.  The more you knead it, the softer it will be, so if it is tough then keep kneading.

Let the dough rest on the counter or in a warm spot for 20 minutes.

While the dough is resting, peel, chop and boil the potatoes.  While boiling the potatoes, sauté the onion in a frying pan with ¾ cup of butter.  There will be much more butter than onions, but it will be absorbed by the mashed potatoes.

The potatoes are ready to be mashed when you can easily insert and remove a sharp knife from the potato.

Drain the potatoes and mash them.  Add the sautéed onions and butter along with the cheese.  Stir until all the ingredients are mixed together and the cheese is melted.  Add salt and pepper to taste.

Cut the dough into quarters and roll out one quarter of the dough until it has the thickness of a wonton wrapper (2-3mm high).  Use a glass or a cookie cutter to cut the dough into rounds.

Place a spoonful of the potato filling into each round.

Pinch the edges of the dough together to make a half circle.

Pinch the edges of the dough together to make a half circle.

Once all of the pierogi have been assembled, bring a pot of water to boil.  Place the pierogi in the pot.  They will initially sink to the bottom.  They are ready when they rise to the top of the water. Instead of boiling, you can also pan fry them with butter.

Serve with carmelised onion in melted butter and topped with sour cream.

Moroccan Lamb Meatball Tajine

Last year I posted a few Moroccan dishes including how to make preserved lemons.  I dipped into my stash of preserved lemons (which are still going well!) to make this tajine that’s bursting with citrus flavors.

I made this in a shallow enamelled cast iron pot, similar to the Le Creuset Buffet Casserole disk that was just the perfect size and served it over a bed of couscous.

Moroccan Lamb Meatball Tajine with Herbs and Lemon adapted from Moroccan Cooking

Ingredients

Meatballs

  • ½ onion, chopped
  • 2 tbs flat leaf parsley, chopped
  • 2 slices bread
  • 1 egg
  • 500g (1lb 2oz) minced or ground lamb or beef
  • ½ tsp ground cumin
  • ½ tsp paprika
  • ½ tsp freshly ground black pepper

Herb and Lemon Sauce

  • 1 tbs butter or oil
  • ½ onion, chopped
  • ½ tsp paprika
  • ½ tsp ground turmeric
  • ¼ tsp ground cumin
  • 1 red chilli, seeded and sliced (or ¼ tsp cayenne pepper)
  • 1 ½ cups chicken stock
  • 2 tbs cilantro, chopped
  • 2 tbs flat leaf parsley, chopped
  • 2 tbs lemon juice
  • ½ preserved lemon, optional (but recommended!)

Preparation

To make the meatballs, process the onion and parsley in a food processor until finely chopped.

Tear the bread into pieces, add to the food processor along with the egg and process for a few seconds.

Add the lamb or beef, cumin, paprika, pepper and 1 tsp salt and process to a thick paste, scraping down the side of the bowl occasionally. (Instead of using a food processor you could grate the onion, chop the parsley, crumb the bread and add to the meat in a bowl with the egg, spices and seasoning, then knead until paste-like in consistency)

With moistened hands, shape the mixture into walnut-sized balls and place them on a tray.  Cover and refrigerate until required.

To make the herb and lemon sauce, heat the butter or oil in a saucepan and add the onion.

Cook over low heat until soft and golden, then add the paprika, turmeric, cumin, and chilli or cayenne pepper and cook, stirring for 1 minute.

Add the chicken stock and coriander and bring to a boil.

Add the meatballs to the pan and shake the pan to settle them into the sauce.

Cover and simmer for 45 minutes.

Add most of the parsley and lemon juice and season if necessary.

Return to a boil and simmer for 2 minutes.

If using preserved lemon, rinse well under running water, remove and discard the pulp and cut the rind into thin strips.  Add to the meatballs.

Transfer to a tagine or bowl, scatter with the remaining parsley and serve hot with couscous or crusty bread.

Oreo Blondies

I’m a big fan of Donna Hay, who is Austraila’s answer to Martha Stewart.  I’ve tried a few recipes out of her 10th anniversary magazine from October, which had an entire feature on brownies, one of my all time favorite simple classics.

You are probably wondering what is so special about brownies that would make them worthy of Donna’s anniversary magazine, but this was not just any ordinary brownie feature.  She has created brownie cookies that you sandwich around peanut butter frosting and blondies with crumbled Oreos in the middle – both were absolutely amazing.

I’ve made both this month but since the brownie cookies disappeared before I could take a decent photo, I’m writing about the Oreo blondies.

Donna’s recipe calls for cream cheese to be dropped into the mixture in the pan before baking, but I found the flavor much too tangy and would suggest replacing the cream cheese with chunks of white chocolate.  The cream cheese chunks also started to look a bit funny after a day so if you are planning on serving these the day or 2 after baking then definitely go with the white chocolate chunks instead.

Oreo Blondies adapted from Donna Hay

Ingredients

  • 200g (7oz) softened butter
  • 1 cup brown sugar
  • 2 eggs
  • 1 tsp vanilla extract
  • 1 cup of all purpose flour
  • 1 tsp baking powder
  • 200g (7oz) white chocolate
  • 125g (4.5oz) white chocolate chips or softened cream cheese (see note above)
  • 150g (5oz) Oreos


Preparation

  1. Preheat oven to 180°C  (350° F)
  2. Place butter and sugar in a bowl and beat with an electric mixer until pale and creamy.
  3. Gradually add eggs, beating after each addition.
  4. Add vanilla extract.
  5. Add flour, baking powder and melted white chocolate and beat.
  6. Spoon half the mixture into a lined baking tray. (20cm x 30cm or 8in x 12 in)
  7. Place spoonfuls of white chocolate chips on top (could be substituted with cream cheese if you wish).
  8. Sprinkle with chopped cookies.
  9. Spoon remaining brownie mixture on top, covering the cookies completely.
  10. Bake for 25-30 minutes.

My Thai Kitchen Cooking Class

I went to an amazing Thai cooking class with a few of my work colleages at My Thai Kitchen in Brisbane back in November.  If you live in the Brisbane area I highly recommend it!

The owner is the daughter of the family who runs the popular Thai Kitchen in Rosalie that has been serving up tasty Thai food since 1993 and has become a Brisbane institution. The daughter, Taya has expanded the Thai Kitchen experience to a take-away restaurant and cooking school just around the corner – genius!

Besides Taya’s bright and cheeky humor the things I was most impressed with about the cooking school was the achievability of the dishes and the cleanliness of the kitchen, which is the same kitchen as the take-away restaurant.  The class size was small (limited to 8 people that work in pairs) so Taya was able to check to make sure that we were all on track throughout the class and all of the annoying prep work had been taking care of in advance and everything was prepped and organized in individual bowls.  The biggest plus was the assistant that was constantly cleaning up dishes as we dirtied them!

The recipes that you use are the exact ones used by both of the family restaurants and she even lets you in on the secrets of which specific brands they use.

I learned a few new cutting skills – such as how to make cucumbers with striped skins, how to slice a chicken breast into thin enough slices for pad thai, and how to score and ‘thai massage’ a prawn’s belly so that it doesn’t curl up too much when deep-fried.

We spent close to 3 hours in the kitchen making 4 dishes and then got to have a big lunch after the class in the front of the restaurant, which had been closed for the class.  At $125 per class it’s a fantastic way to hone your Thai cooking skills.

We took the Summer Delight class, which included coconut prawns, garlic chicken, beef green curry, and pad thai.

Coconut Prawns with Nam Jim Dipping Sauce

Garlic Chicken

Beef Green Curry

Pad Thai

 
Contact Details:
(07) 3369 8555
Shop 18 Centro Milton, 36 Baroona Rd, Milton QLD 4064
 

Buckeyes

Happy Thanksgiving!  I took these into the office today along with a pumpkin pie to so that my non-American colleagues could finally taste some authentic American classics.

Buckeyes are the nut off of the state tree of Ohio (and mascot of Ohio State University) and this might as well be the official state candy because every good Ohioan knows how to make a mean buckeye.  I’m not from Ohio but learned how to make them from my Stepdad’s family in Ohio and I’ve been making them for Thanksgiving potlucks and holiday parties for the past few years.

I’ve always made the traditional buckeye candy recipe but this year decided to try Smitten Kitchen’s because she uses less powdered sugar and adds graham cracker crumbs, which I thought could add some extra texture.  Since I am living in Australia and can’t find graham crackers anywhere, I did quite a bit of research (including taste testing with my few remaining imported graham crackers) and discovered that digestive biscuits are almost identical in taste to graham crackers.  Win!

My boyfriend’s mom loaned me her #70 scoop that came from Uncle Stan Wigley’s Charters Towers Café in Northern Queensland who used the scoop to make milkshakes in the 1950s.

Buckeye Candy Recipe adapted from Smitten Kitchen

Yield: I made 77 with a #70 (1/2-ounce) scoop – and I measured the first few to make sure they were ½ ounce.

Ingredients

  • 1/4 cup (2 ounces) cream cheese, softened
  • 1 1/2 cups smooth peanut butter
  • 1 cup digestive biscuit crumbs (or graham crackers if you are in the U.S.)
  • ¼ tsp salt
  • 3 cups confectioners’ (powdered) sugar
  • 10 tablespoons (1 1/4 sticks or 5 ounces) unsalted butter, melted and cooled
  • 12 ounces dark chocolate, coarsely chopped

Preparation

  1. Beat the cream cheese and peanut butter together until combined with an electric mixer.
  2. Add the digestive biscuit (or graham cracker) crumbs and beat for 10 seconds.
  3. Add the sugar and butter, and mix on the lowest speed, then increase the speed until the ingredients are combined. Scrape down the whole bowl well, then mix again. The mixture will be quite sturdy and a little dry — perfect for shaping.
  4. Line a sheet pan with parchment paper. Scoop out ½ ounce scoop of filling and use your hands to form it into a ball (make sure it is sturdy enough to withstand being poked with a skewer and dipped in chocolate).
  5. Place the ball on the prepared sheet and repeat the process until all of the candies have been shaped.
  6. Chill in the refrigerator for 30 minutes before dipping in chocolate (optional but really makes them a lot more sturdy against the skewer and melted chocolate).
  7. Melt the chocolate either over a double boiler, stirring until it is completely smooth or in a microwave in 30 then 10 second increments, stirring before you start it again until it is completely smooth.
  8. Let it cool to tepid (about 100 degrees, though I’d go a little cooler next time for a thicker coating).
  9. Using a fork or large skewer, dip each ball into the chocolate and roll it about so that almost the entire candy is coating, leaving a small circle uncoated. Smitten Kitchen recommends sticking the skewer in the side, angling the bowl towards it and making sure it is submerged as you roll the candy around.
  10. Chill the buckeyes until they are set, about 30 minutes.

Do ahead: Buckeyes will keep in the fridge for up to a week, or I’ve had highly restrained friends keep a stash in their freezer for a year!

Cornbread with Bacon

Cornbread is one of my all time favorite side dishes because it’s so versatile and it’s easy to play around with different additions.  Since it’s Thanksgiving week I thought I’d post about this in advance of the big day in case anyone wants to have a little slice of Americana on their table, whether or not you actually celebrate Thanksgiving.

I’d never thought about adding bacon and a hint of maple syrup to cornbread before this recipe and it was great. I usually go the Barefoot Contessa route and add lots of cheese and jalapenos, which I do recommend if you are feeding a crowd, but this bread was a perfect sized loaf for a family dinner.

If you are in Australia you can find yellow cornmeal at specialty food stores (Fundies in Brisbane and Byron Bay) or you could try polenta if you don’t feel like hunting for it, just know that it will be a slightly different texture.

I didn’t add as much bacon as the recipe called for but wish I had in the end because it needed that extra moisture.  I would also consider using creamed corn instead of just canned corn for some extra moisture.

Cornbread with Bacon adapted from Food Lovers Lunch

Ingredients

  • 1 tsp vegetable oil
  • 12oz (350g) bacon, chopped
  • 2 scallions (spring onions), finely chopped
  • ½ cup (120g) canned corn kernels, drained
  • ½ tsp hot pepper flakes
  • 2 cups (350g) cornmeal
  • 2 1/3 cups (350g) all purpose flour
  • 1 tsp sugar
  • 1 tsp baking powder
  • ½ tsp baking soda
  • ½ tsp salt
  • 1 ½ cups (375ml) buttermilk
  • 2 eggs
  • 2 tsp melted butter
  • 1 tsp maple syrup
  • ½ tsp freshly ground black pepper

Preparation

  1. Preheat oven to 400°F (200°C) and grease a loaf pan.
  2. Heat the oil in a cast iron skillet and cook the bacon until crispy.
  3. Add the scallions and cook with the bacon for about 5 minutes.
  4. Stir in the corn kernels and pepper flakes, then remove from the heat and set aside to cool.
  5. In a large bowl, whisk together the cornmeal with the flour, sugar, baking powder, baking soda and salt.
  6. Add the buttermilk, eggs, cooled bacon mixture, melted butter, maple syrup and pepper and mix until just combined.
  7. Spread batter into the prepared pan and bake until a toothpick inserted into the center comes out clean, about 30-40 minutes.
  8. Slice and serve warm with butter.

Choko Sautéed with Bacon and Mushrooms

Choko has gotten a bad wrap over the years as a lowly peasant food, but since peasant food has been making a come-back on restaurant menus the past few years with the resurgence of dishes like oxtail I decided I decided it was time to give the choko a chance, especially since it has such a vibrant color.

It is commonly found as a vine hanging off of fences in Australia but is actually native to Central America and Mexico and was spread to many areas of the world after the Spanish conquest.

Choko, which is also known as the vegetable pear, is from the gourd family, is low in calories and a great source of vitamin C.  When choosing a choko look for one that is small, bright green and without any brown spots.  The ‘meat’ of the choko can be cooked like almost any vegetable once the seed is removed from the core. Some swear that you should never boil it, and that sautéing is the best option so that’s how we cooked it – sautéed with mushrooms and bacon.  For more choko recipes visit Burke’s Backyard.

Ingredients

  • 1 small green choko, seed removed, skinned and finely sliced
  • 150 g mushrooms
  • 80g chopped bacon
  • 1 tbsp oil
  • ½ tsp lemon pepper (or seasoning of your choice)

Preparation

Heat the oil in a fry pan.  Add the bacon and sauté until it starts to brown.  Add the sliced choko and mushrooms.  Season with lemon pepper.  Continue to sauté until the choko and mushrooms are almost soft – with just a slight firmness.

Can be served as a side dish to chicken, pork, fish, or even as brunch with eggs!